

Page Five
Return to Page 1 . Return to Page 2 . Return to Page 3 . Return to Page 4
|
Fingerboard Revisited Back last year, when I glued the fingerboard on to the neck, I chose epoxy glue instead of normal PVA or Aliphatic Resin. This is such a wide fingerboard and the LED routing lines added some complications, I didn't feel comfortable using a glue that bonds by penetrating the wood, so I went for a contact glue instead (epoxy). I used the same idea on "George" because wood glue reacted with the cocobolo fingerboard and dislodged 2 weeks after setting. I then epoxied it instead and as a method, it proved very sucessful. But this time I used another brand of epoxy which was a bit more fluid/thinner than I expected. The fingerboard absorbed some of the moisture in the glue which effected the adhesion. Some parts of the glue didn't cure correctly and remained soft, I think that some of the resins in the rosewood also reacted with the curing process and acted as an inhibitor. The added moisture in between the board and the neck caused the board to warp slightly. After gluing the board to the neck I oiled the board with Lemon oil, I noticed that the fingerboard was trying to lift from the neck...Duhhh! One year later, to my dismay, it got so bad, the board had to be removed. And it nearly broke my heart. So now here's an update page detailing how I fixed it.
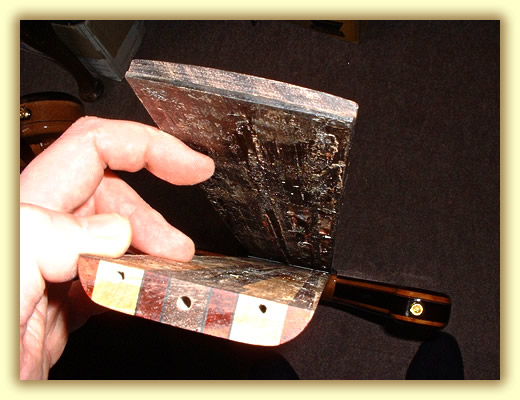
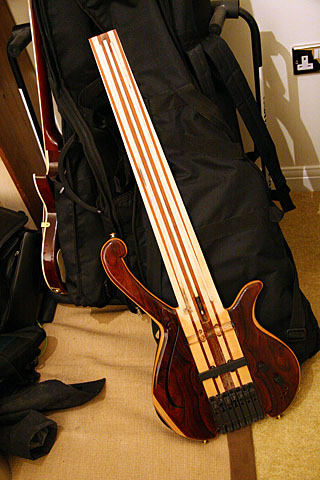
Here's what she used to look like.
|
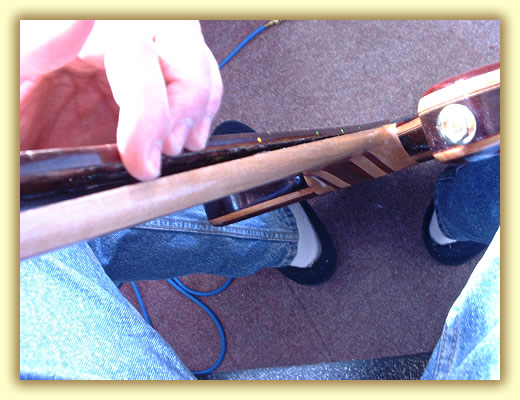
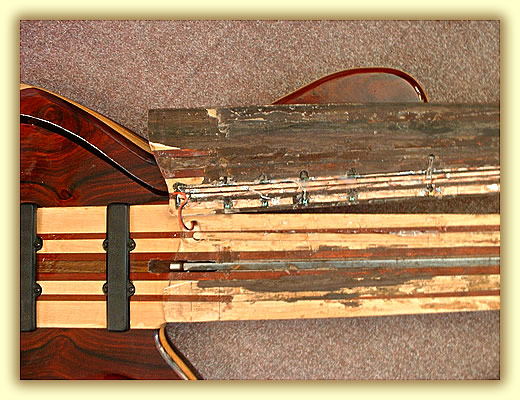
After a little tugging, I realised that the board was slowly coming free. In fact the glue hadn't cured at all in some places and was still soff. I used a long blade from a retractable knife and pushed it down between the fingerboard and the neck and I slowly (with a lot of force removed the board. |
|
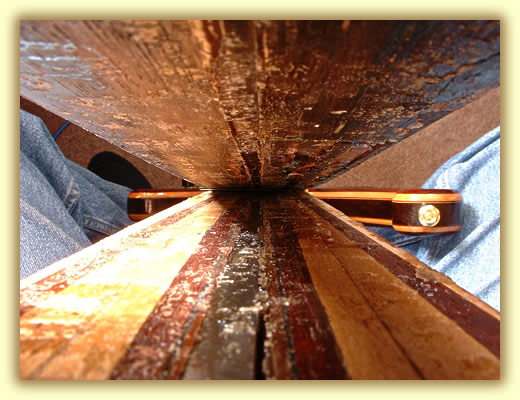
Ahh the Jaws of the beast!
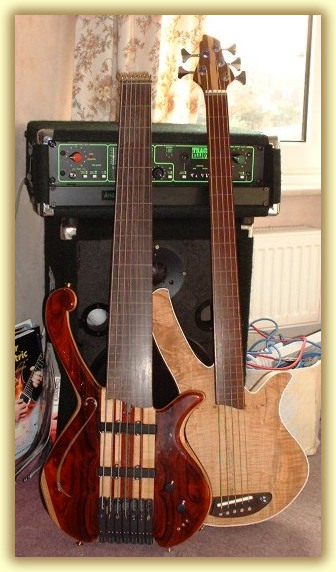
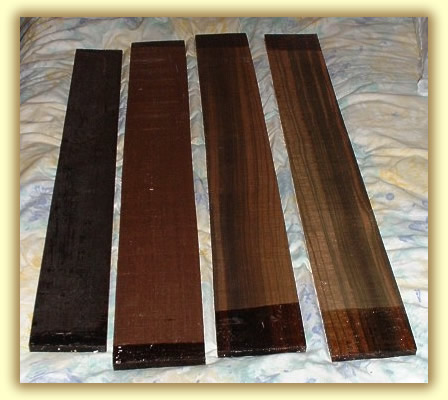
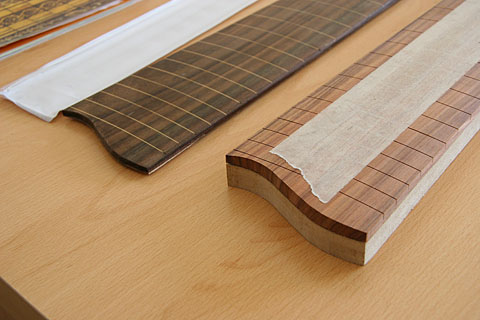
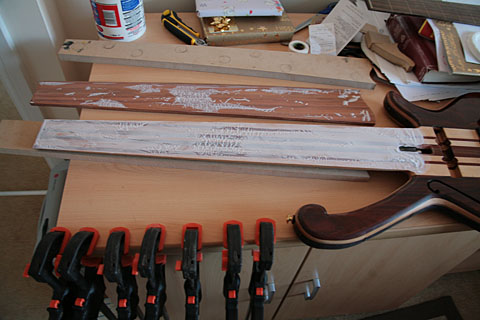
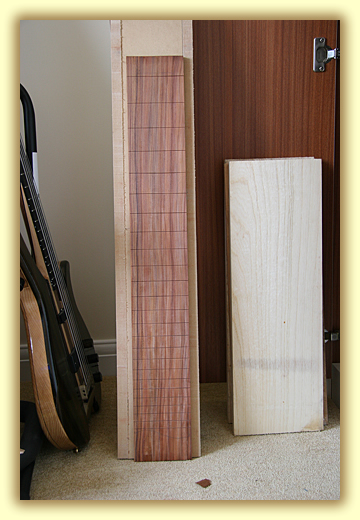
The Black fingerboard to the left is the Black Ebony for Mike's bass and will do a sixer happily. The brown board is Wenge, nice and wide for a seven or even an eight...The other two are marbled Ebony, my favorite exotica. I used some of this on my 4 string fretless (project 3) and it looks stunning. these two examples are very nice, but not quite as figured as Project 3's. still they are very simular and will easily do a pair of sevens. |
It looks bad doesn't it! Belive me my mood is not good. I'm in two minds as to what to do. Do I try and save the fingerboard and re-use it, keeping the existing tone unchanged or do I completely replace it and make a new one out of some of my fingerboard stock? I really like the sound of this bass the way that it is, so I don't want to change any of the tone woods. It's also the thought of cutting those bowwood 34" scale slots again...and fitting the LED's all over again. Mind due, I could probably make a few improvements while I'm about it, the old LED's used to kill a 9v battery in about an hour...Hmmm. I wonder if I should use a fast switching circuit and multiplex them instead? But I do want to make another identical 7 string but fretted. I don't have a 2 wide rosewood boards about but I do have 2 marbled ebony boards... Sigh... Decisions, decisions
Mike's Ebony for his Sixer, a Wenged and two striped Ebony boards that will do seven stringers quite hapilly. I also have 2 matched Rosewood boards on order. |
|
|
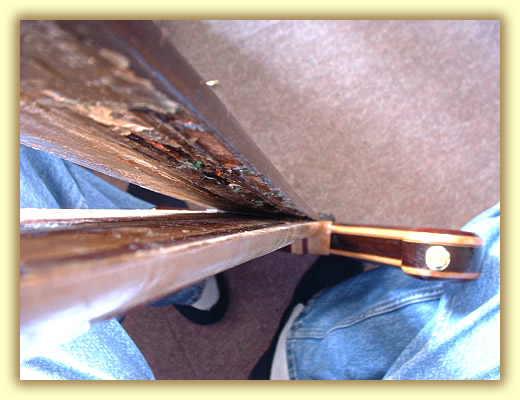
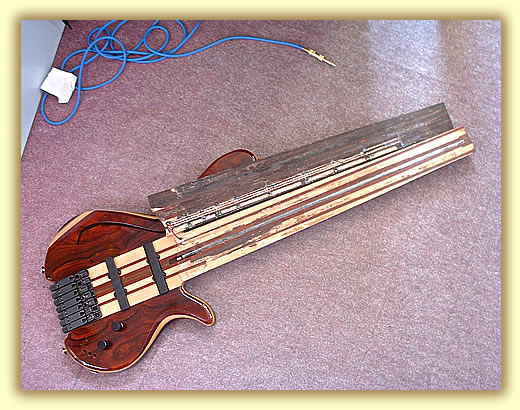
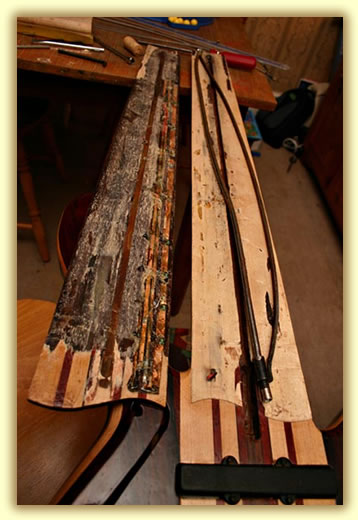
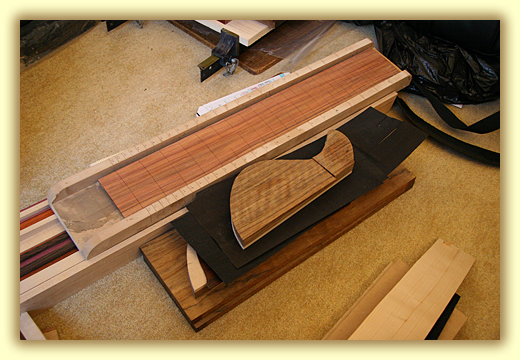
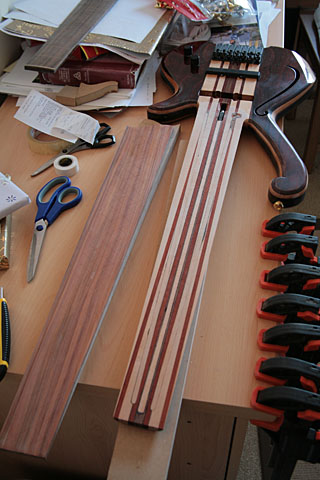
Here's a picture or two of the fingerboard lying next to the neck, but with the LED connecting leads still attached. The neck laminates on the fngerbaord was a shim I had made to lift the fingerboard slightly. There's a lot of epoxy resin still on the neck and quite a lot of the Rosewood from the fingerboard too. That'll need plaining and sanding down. Also there's a fair amount of chunks missing from the underside of the fingerboard, that'll need filling on the neck, if I re-use it! I could use this neck as a routing template and make another board exactly the same size, then I'd just need to cut the fret slots and fill them with box wood or Maple inlays. This would be good because when I make the second 7 string, I already have the fingerboard template. While I'm about it, I'd also like to widen the truss rod adjustment hole a little, it's just a bit too tight to get enough swing on the allen wrench. |
 |
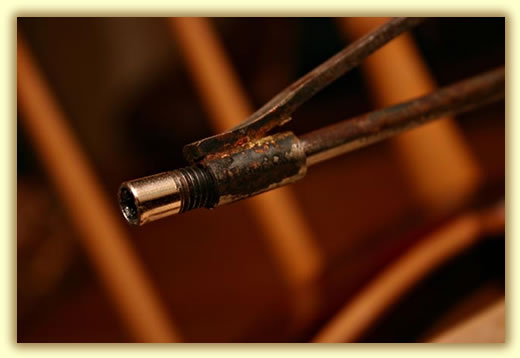
Removal of the broken 2 Way Truss Rod
In trying to bend the warped neck back into shape, the truss rod had failed. After removing the fingerboard, I started the tough task of removing the failed rod. It was a lot more rusty than I expected and the epoxy that I used hadn't done a very good job in securing it in the channel end either. |
|
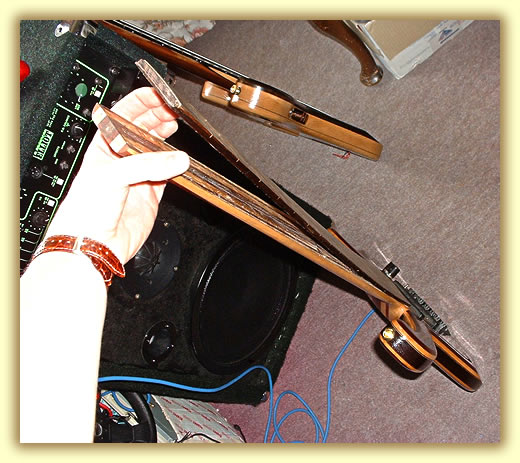
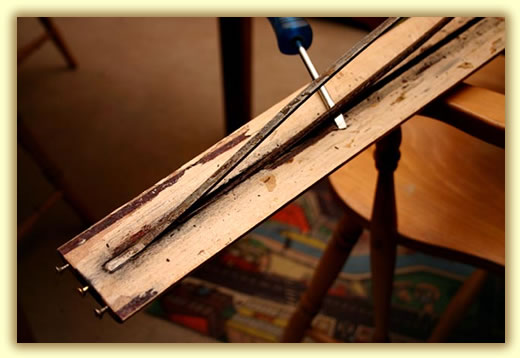
Last little bit...easy does it. You can see how much the rod has bent! That kink should be flat!
|
I used a wide flat headed screw driver and eased to rod out really gently by turning the screwdriver and causing the shape of the driver to act as a wedge, leavering out the rod slowly, an inch at a time. slowly I manuevering along it's length.
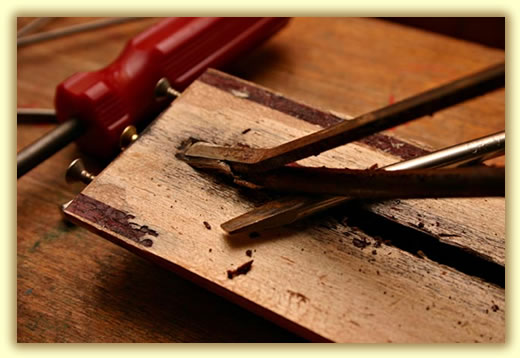
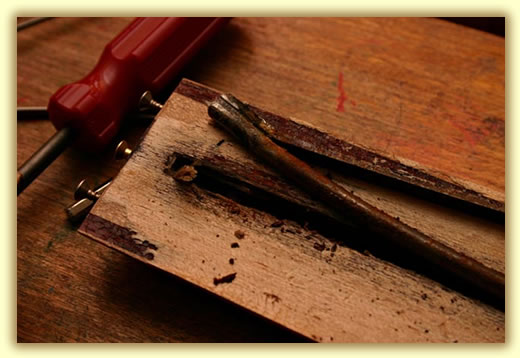
Above, you can see the extent of the rod's damage. It's been tightened way beyond it's elastic limit. I suspect that the 2 way rods are a much weaker design than the aluminium box rods that I'm used to.
On inspection, the brazing fixing the upper rod to the allen nut surround to have failed, with a big split in it. I am thinking that this rod was of a sub-standard manufacture to fail at this point. There's a lot of epoxy resin and rust debris still in the rod's channel that'll need re-routing to clean it out. Thankfully I have a few better rods in stock..ah no i haven't, thay are for a 35" scale...duhh! |
|
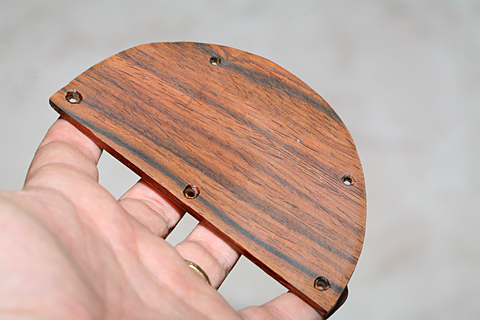
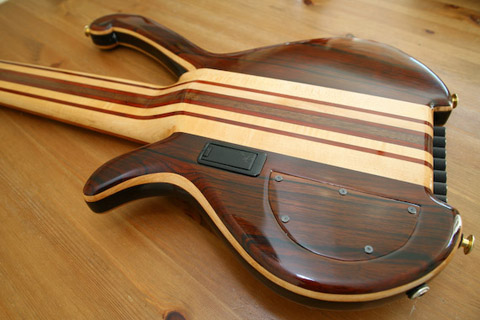
This cavity cover is grain filled using the new Epoxy filler. It's now completely flat, almost like a piece of plastic.
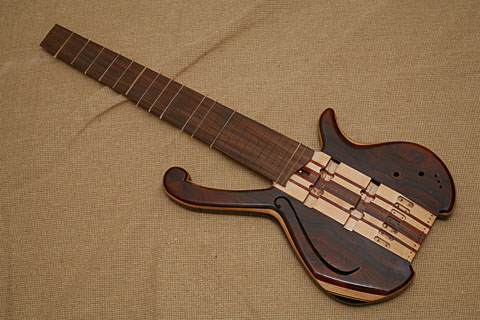
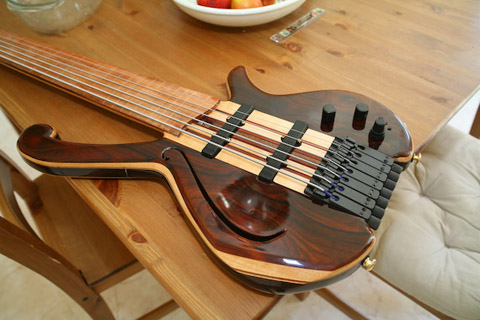
This is what this bass looks like after I've done a bare wood re-finish. The component parts are just placed on at the moment to show how it will look. All of the electrics are un-soldered. It's very difficult to show just how glossy and shiney this new finish is, once polished and buffed.
This image shows the shine a bit better.
Here, I've re-fitted the pickups and fitted the Bartolini 2 band EQ.
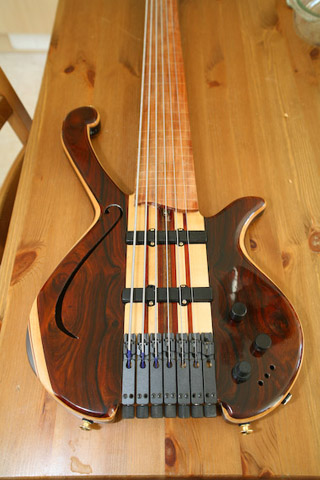
Strung her back up and ready to play
A mirror like Shine to her new acrylic laquer
|
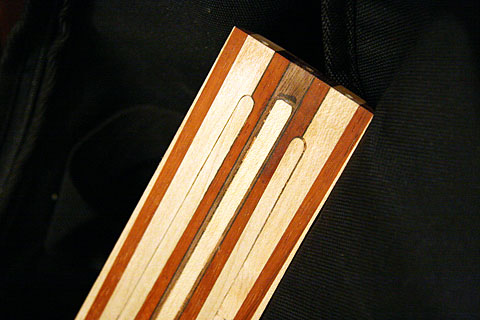
This is the cleaned and flattened neck. I have already fitted the new 34" dual action truss rod and placed a thin maple fillet over hte top. This was then flattened to match the neck, ready for the fingerboard. This truss rod was epoxied in the end of the rod as usual.
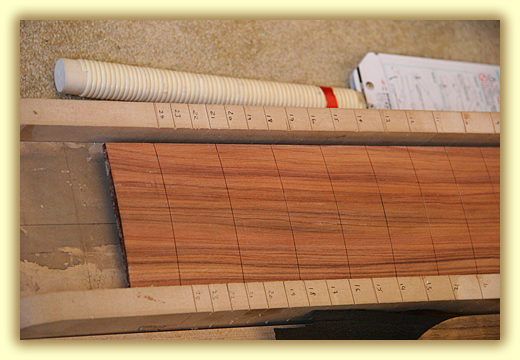
A new 4.5" wide Santos Rosewood Fingerboard was ordered (actually two of them) and was slotted to a 34" scale. This I did with my new Japanese back saw. It's Ok, but I prefer my old Crown back saw. It's not as good to cut with but it doesn't flex as much as the Japanese tool. And I also made a new 34" scale slotting jig (simular to my 35" scale one that i built for Mike's bass)
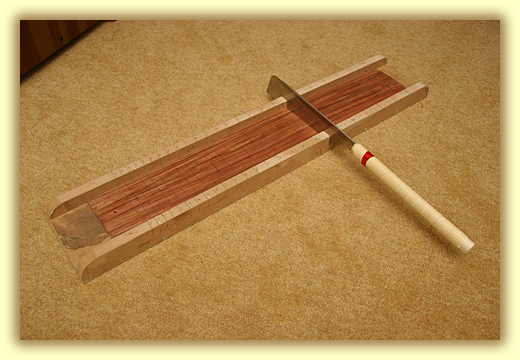
This finger board was then hand sanded to a 16" radius...and that takes forever with a 4.5" wide board. This took about 3-4 nights of Planing with a very shallow plane (which had to be really really sharp) and a Radius block that I purchased from Craft Supplies, using 60-240 grit papers. I then cut the gentle crest curve and the end of the fingerboard. I did this using my router fitted to a routing table. The router is upside down, with the bit poking through a hole in the table. I made a routing template from MDF, using the old fingerboard as a guide. The new template is flat and exactly the same shape as the old fingerboard. I fitted the new fingarboard to the template using good quality double-sided sticky tape and routed around the template using a template bit.
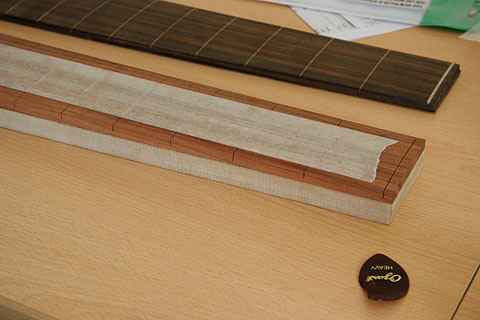
Here's the 19mm MDF fingerboard template that I made from the old fingerboard. This was made very easily. First I cut out a blank on my bandsaw. Then I used double sided tape to attach the old fingerboard. I then cut close to this on the bandsaw to reduce the ammount of wood I need to be removed by using a router. I used a router table, which allows a router to be fitted upside down. I fitted it with a ball baring template follower bit. This allows me to cut the MDF exactly the same as the fingerboard. I then remove the old board and attach the new fingerboard to it very carefully, double checking each measurement. I then slowly rout around the template using the opposite bit (this one follows a template below and cuts above, the last one did the opposite).
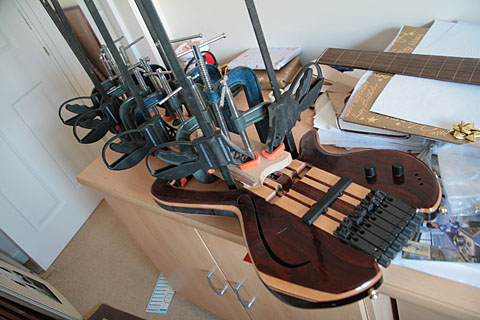
I scored the underside of the fingerboard and the top surface of the neck with a craft knife. This helps the glue to deeply penetrate the two woods and bond the Rosewood to the neck. I then applied copious ammounts of PVA glue to the neck and placed the fingerboard on to it. I then attached an MDF cauls on top and below (to make a neck/fingerboard sandwich) and carefully fitted 2 clamps. Slippage is again a huge concearn here and I hade to remove the fingerboard several times because it moved too far under the clamp load. I finally got the fingerboard how I wanted it and fitted the rest of the clamps. I used every clamp at my disposal and allowed to set for a few days. After the removal of the clamps, I noticed that the neck to fingerboard join wasn't as good and as I'd likes. I'm far more used to Ebony which spreada an even load better. Rosewood is a lot softer and I need to be mindfull of this in the future. It's not a disaster (this bass has had a lot of that!) but is just a little annoying and looks a bit sloppy if you can see it. It won't affect the tone in any way and the join is very solid. I can fill the slight gap quite easily. The I dyed the fingerboard using a Rustin's wood Dye. It's pretty effective and has left the grain still showing but darkened the board so that it resembles the old board more. I've also started to fill in the fret slots with maple veneers. I'm also experimanting with some new grain fillers (an epoxy based system and a traditional) and I'm going to test a new acrylic based finish on this bass soon. Here's a shot of the cavity cover that's been grainfilled and is ready for laquering. It's diffucult to show how much work this envoles because there's not much to photograph and it dosn't look much. But it's a job the demands patience and perfection. And that takes time.
The black grain lines are filled so that they now sit flush with the reast of the wood's surface. I'm currently trying a new Epoxy based filler. It's a pig to sand down once it's cured but it's great because it relly fills every nook and ding. It also is totally clear with no colour casting and I can use it with any wood colour. Traditional fillers are coloured and a seperate colour have to be used for each wood, which is a pain. especially if a wood colour like Ovankol isn't available as a filler. Tradidtional fillers are easier to apply and remove the excess but I'm going to stick with the epoxy. This new acryllic laquer gives a very nice finnish, ultra glossy. Very reminicent of Nitro-celulous laquer, but with out the harmfull gasses and the explosive nature of the over spray. This laquer can be brushed on very easily, with a foam pad, and I've got very good results. I'm finding that it takes a long while to cure fully. My light wet sanding is done with a 600 grit wet and dry, which is actually quite a fine grit. It's buffing up well, with only a few residual scratches left. I think I need to let this bass stand and harden for a few months more. More Pics to follow.
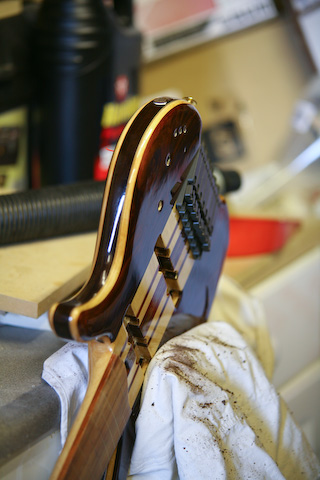
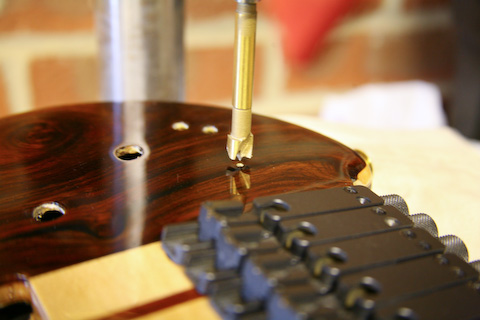
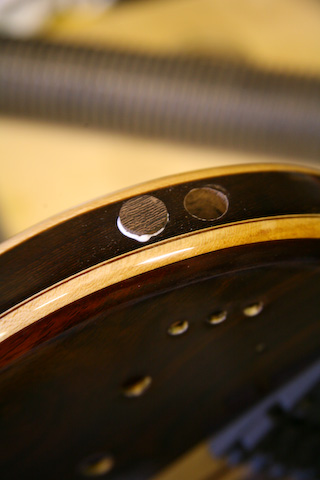
Whilst I have this Bass apart, I think it's time to address a few mistakes and design mistakes that were made along the way. The long jack socket used to foul one of the Pots and it really needed to be moved about an inch further round. I drilled a new 12mm hole using a Forsner bit and cut a piece of matching Wenge to fill it. This was then painstakingly sanded into a tapered 13mm plug and then glued into place. Once dry, I will plane and sand it flat and re-apply the laquer to it. I'd also like to fil the three switch holes on the front too. I also have a new Bartolini 2 band EQ circuit which I intend to fit. This uses a Stacked Bass and Treble pot that'll need a new hole drilled for it. I always intended this bass to have 3 holes on the front, but I never drilled it (except for the pilot hole). I used a 10mm Forsner bit. This new EQ circuit has an active/passive switch built into the volumn pull up pot. So that I can play the bass passivly of active with the 2 band EQ. The new control layout will be: Pan / Vol / EQ. This EQ can be run at 18v, but I'm sure that 9v will be plenty. Interestingly, in this photo you can really see how well the shine reflects the pillar drill's column and the Forsner bit too.
Over the long time that this bass has been apart, I lost the wiring diagram for the Bart 2 band EQ and the Kent Armstrong piackups. Because these pickups are custom humbuckers, they have 4 pins each and have no coloured wires attached. Each pickup is available as a coil tap, humbucker or single coil. This makes their wiring quite complex. After figuring it all out with a multimeter, I had to integrate them into the Bartolini 2 band Active EQ. When I first wired this all up, I'd accidentally wired the jack socket round the wrong way and my pickups were wired out of phase single coils...hehehehe...oppps. I though it sounded very thin and trebly! The Bart circuit has a built in blend buffer, so I have to use the supplied blend pot. I prefer to use a Vol-Vol pots. But this Circuit won't let me. There's something odd about this Pan pot, it centres to a "no signal" and not the usual blend of the two pickups in parallel. At either end of the pan, it's fine. Either pickup selected...just another wiring problem to solve. It might have been wrongly wired from Bartolini...these things can happen. The Volumn has a pre-wired active/passive pull swich. it's Ok and it works nicely, except that I'd prefer the pull up to actives the EQ, where as at the moment it disengages it. More soldering to do. The shielding seems to have a few gaps somewhere too. It's picking up stray signals and buzzes from VDU's. So I think I need to work on the shielding more. With Active EQ's, they pickup RF far more than passive circuits. "Too much" shielding is usually "not enough". |


Return to Page 1 . Return to Page 2 . Return to Page 3 . Return to Page 4