
Custom Pedals
|
It's quite hard to find a really good bass Overdrive. Most are designed for guitars and the tone controls are voiced all wrong for bass. Often the overdrive circuit cuts bass freqencies too, so to adapt guitar FX designs, there usually needs to be a few component swaps. |
|
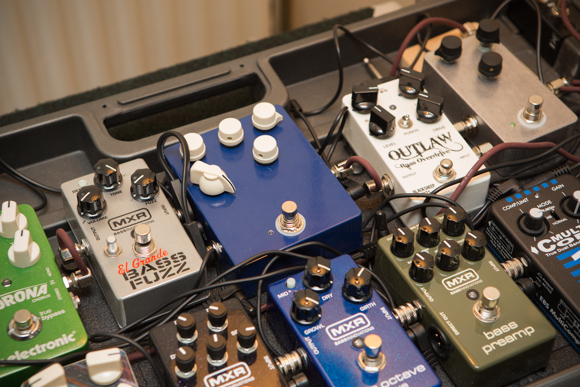
Below is my current layout and arrangement. Now that everything is being powred from a good PSU, the tones I'm getting are amazing. By far the best tones I've heared from my gear!
|
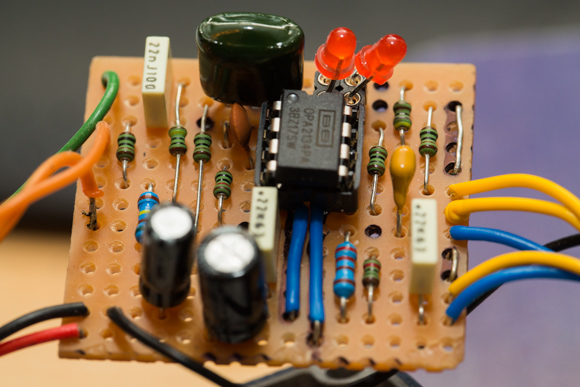
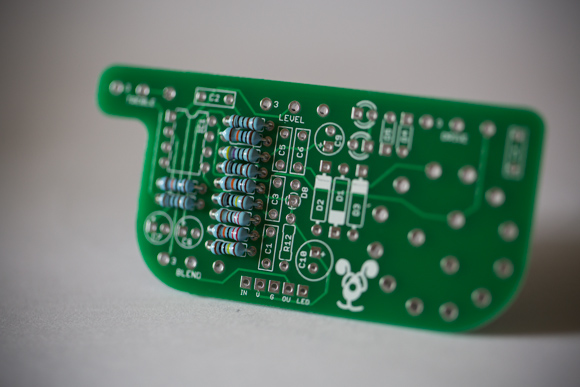
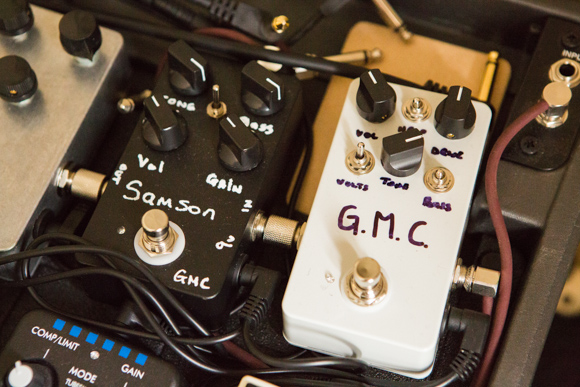
GMC Bass Overdrive Combo My first home made pedal is a Clay Jones / Landgraff Dynamic Overdrive. But I've chosen the "son of" variant, which dispenses with the buffers. It's my first time with electronics since I finished my A level in Electronics, more years ago than I care to mention. It's a great circuit to lear on, it's small and fairly simple to construct on Vero board. Shortly after mamking this, I found a company which sells a great etched PCB for this exact circuit...it's based on a simplified TS808 tubescreamer circuit! The first build was quite tricky and built on vero board for me, I was inexperianced and I made a lot of mistakes. I rather nievely soldered up the foot switch, jacks and 9v power outlet up, thinking everything will work first time. Well, I guess it was a good learning curve. I soldered the footswitch terminals wrongly (it was rotated 90') and my LED's (used for clipping in this circuit) were also round the wrong way. My PSU is a 1.7 amp OneSpot (a great unit for daisy chaining) and to my dismay...the socketed IC went up in smoke...quite amusingly! So I stipped out the vero board and soldered a 9v battery terminal (less current if it goes wrong) and wired the LED's correctly. I also found and earth fault and kept the initial fault finding as simple as possible. I swapped out the £3 IC chip and it worked....it lives! It sound's pretty nice. Based on a Tube screamer circuit, it's pretty clear sounding. This will go into a larger enclosure than expected...it will share space with a second circuit, which will run from the output of the clay Jones. It's a BJFE Honey Bee Overdrive circuit. This is quite subtle and warm sounding. This is currently being built, so far the Vero is prepared, links soldered, IC socket, resistors, caps and diodes are soldered. It's just waiting the pots and final testing. Once this is complete, it'll be soldered into the Box along with the clay jones and I'll be looking for a pair of clean blend circuits to add to each circuit and a three band EQ circuit to add to the end of the chain.
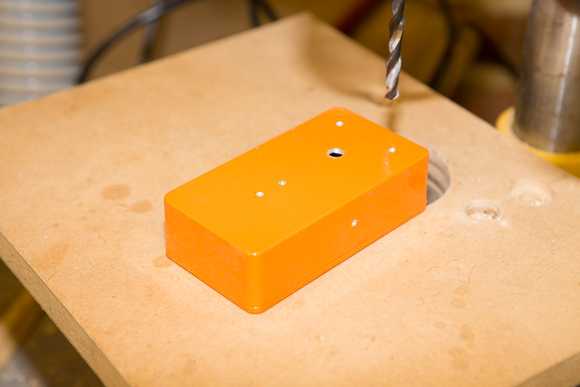
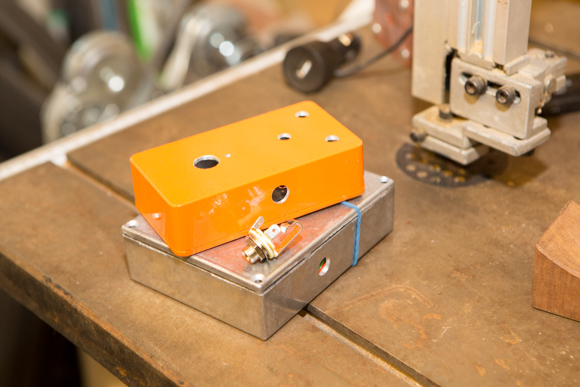
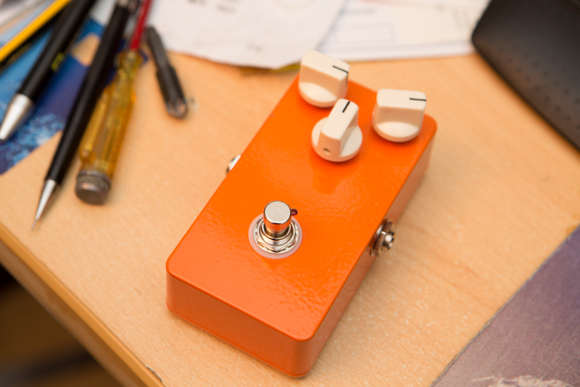
I decided I wanted to seperate the two pedals for the moment...mainly for fault finding and so I could enjoy this pedal while I was building the next circuit board. This is the Son of Clay Jones / Landgraff Dynamic Overdrive clone, but without the buffers. It's essentially a TS808 tube screamer but with the Diodes replaced with a pair of red LED's and a very sweet 123A IC chip. It's got bass friendly caps, although it does loose a little bass, it's a lot better than most guitar effects pedals. It sounds like a very clear and vibrant tube screamer. It's sound is quite transparant and what goes in comes out with an overdrive sound. It's got some silly gain and the drive pot seems to max out early. On hind sight, I wished I had found Fuzz Dog's site before I built this build on Vero board. It's far nicer to have a well thought out PCB build than scrappy vero builds. After drilling my 1st enclosure....it's a lot easier to buy them pre-drilled from Fuzz dog too.
|

|
|
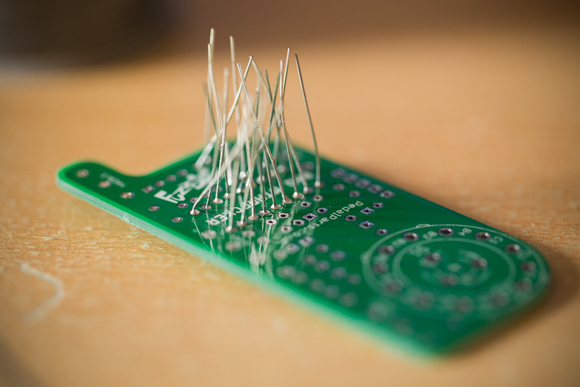
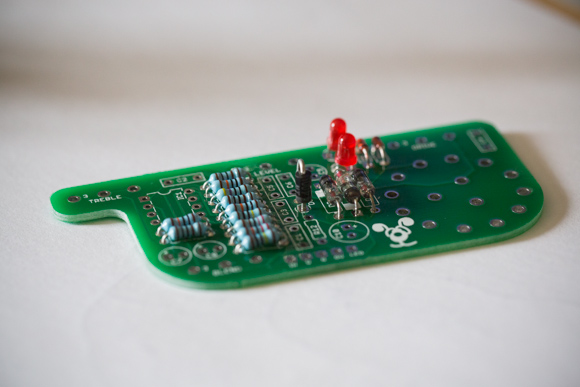
After building a few pedals on vero board, I wanted to migrate to PCB builds instead. They look neater and a lot more professional. I've been using Fuzz Dog's Kits So far, I've built three of his kits and they are excellent and highly recomended. This was based on one of his kits and I bought it with a pre-drilled enclosure, which I then applied a custom artwork using heat fix paper. This pedal I have called "Lion of Judah" Overdrive. It's based on a Wampler Tripple Wreck circuit, But I used Fuzz Dog's advice and swapped out the boost circuit for something a little more interesting. I also swapped out two of the 4148n Clipping didodes with a pair of red 3mm LED's. The raw circuit left me a bit unimpressed and was a little charectorless on bass. It's not always about how much overdrive, but the quality and complexity of the overdrive which is more important. This pedal can still get quite wild...but it can go from very light OD into really really heavy Fuzz. It's listed as a distortion pedal and this isn't quite true...it's really an OD into Fuzz pedal. The three band EQ adds to it's versatility and on the Bass, it's really very nice sounding. Althought he heavier sounds are amazing and very fun to play...they aren't always appropriate! |

|
|
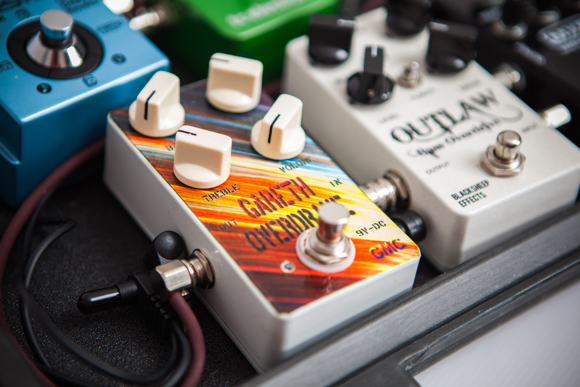
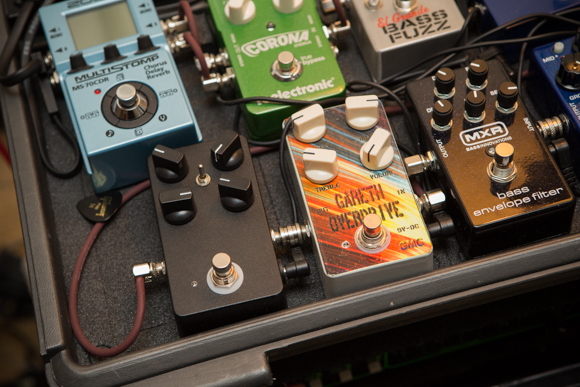
This pedal I have called "Gareth Overdrive". It's based on a Timmy OD, with a few bass friendly caps swapped in. The internal dip switches are dialled in for the best bass responce too. It sounds great, although the bass and treble pots are cut only and aren't too useful on bass. The treble cut is nice for a more vintage / wooly sound. The gain has a really nice breakup and it can go from very light and mild OD to medium grit. The heavier end isn't so nice, but in the mid and low gain, it's very charismatic. On guitar, this pedal is really nice, on bass it's very good and keeps the bottom end well. This was supplied as a kit from Fuzz Dog with a few mods from me. His kits are excellent and I buy the new pre-drilled enclosures from him too...what a service!
|
|
|
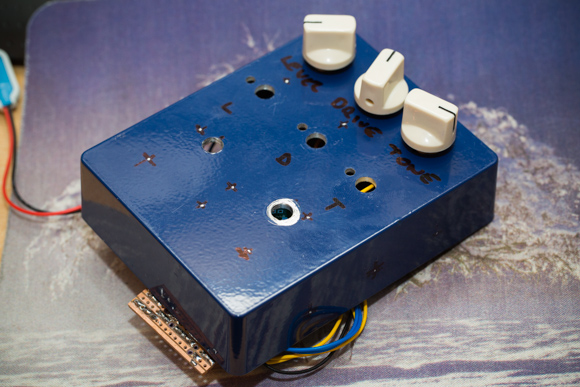
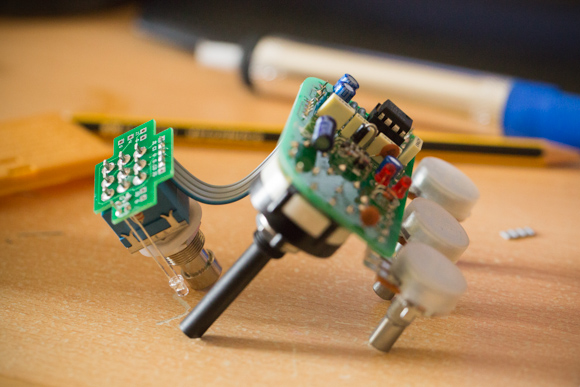
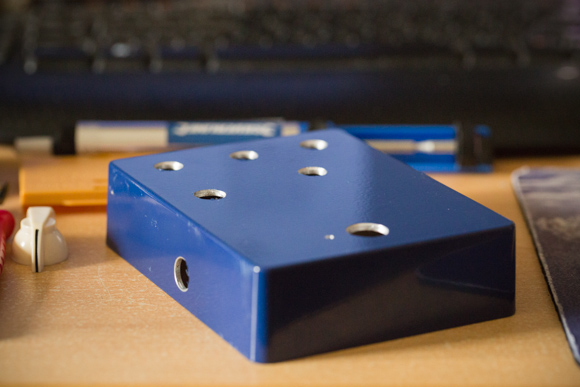
I really wanted to build a Dam Ezekiel Fuzz box clone and Fuzz Dog now makes a great kit. I had a spare enclosure kicking around so I drilled this one myself.
Which sounds easy...but it's a lot harder then I contemplated with this layout. The pots are in very specific placements and are hard soldered onto the PCB.
The circuit was a fairly simple build, I think it took me about 4 hours in all to build. A further 2 hours to drill the case and then fit the components into the various holes.
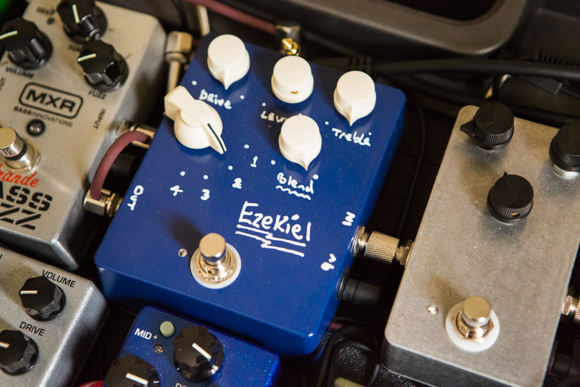
The casing decal / lettering was really simple, I hand wrote what i wanted using a white paint pen. This one I wanted to keep it simple.
With a blue enclosure and white lettering...the only colour I could choose for the knobs was white :D
It's a really interesting bass fuzz, it has 4 different clipping options. A blend to dial in the amount of dry signal which sort of becomes a dry signal volume control, a treble control to handle the high end roll off (great for more vintage tones), although the raw signal carries a lot of treble harmonics. The gain control handles the grit level, so with the blend this can act like a grit volume and then there's an over all volume control. This is useful because the 4 clipping modes have a huge variation in output gain between them.
1. Geranium Fuzz - very fizzy / buzzy / squished sounding Seems to work best with the blend and low gain, so it needs a lot of extra volume. A little drop on the tone pot too. Completely clean on the gain knob kills the tone a lot
2. Silicon Diode - less fizzy / buzzy and more open sound. but hardly transparent. Higher out put and more grit, but still works best with the blend. Less tone pot and less volume is needed. Completely clean on the gain drops the tone a fair bit.
3. LED clipping - much more transparent and warm. More of a heavy overdrive sound and very amp like. A much higher amount of grit and volume, less compression too. The gain control can go to completley clean and it still sounds ok. It can also do quite mild overdrive. The volume needs to be backed off a lot and the gain needs gentle handling. It can get very very wild, very early on the turn. It carries a lot more bottem end than the other two options. It's quite transparent and your bass signal is still there in the grit, but the blend can dial in more of the origianl bass signal.
4. Op amp clipping - just the JRC 2562 chip being overdriven by the circuit. This is the most transparent and loudest of the four clipping options. The volume really needs tugging back and the grit is simular to the LED option but more so!
So my analysis of this pedal and it's 4 clipping options is that 4 is a wilder version of 3 and 1 is a wilder version of 2. Alll four are great but in reality 2 options would do fine. It tends to favour the wild side of distortion...but it is described as a fuzz, so that's not a surprise. But with some careful handling, it can produce some lighter and more subtle tones but the pedal really does want to provoke you to shred. The blend control adds a lot of versatility and this is a very clear sounding unit..it's articulate and detailed.
|

|
|
My Wampler Euphoria clone, I REALLY like this overdrive. Bass boost / cut and treble cut pots...the grit can go really light or quite wild. Drop the gain to zero and the pedal can be used as a clean boost (which is very transparent and clear sounding). The grit is great, there's very little to not love about this pedal on guitar or bass.
|
|
|
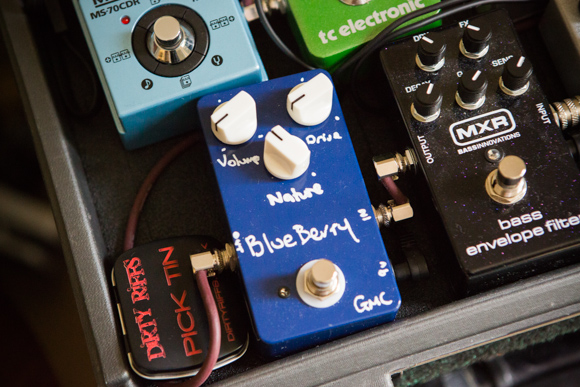
My
Blueberry clone, very nice and capable of a lot of subtle breakups through
to quite heavy grit. The nature pot is tilt control so turn it one way
and it cuts treble and boosts bass (goes dark and boomy) and turn it
the other way it goes bright and clangly. For a one pot control its
very nice on bass, although there is no way of handling mids with this
system. If I was going to run with only one Overdrive, I'd prolly choose
this one...or the Wampler.
|
|
|
My OCD clone, this is based on a v2 unit with a custom extra bass switch, 9v or 18v option and a HPLP switch. It's a great unit and carries a lot of bass through it. The tone is a treble cut and it's an articulate and detailed pedal. It's probably best described as a "heavy overdrive" to "light fuzz" and I really like it a lot. I used to have a Joyo UD, it's ok but very wolly sounding compared to this unit. |
|
|
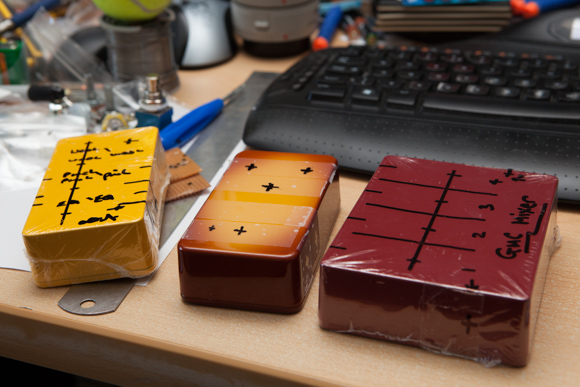
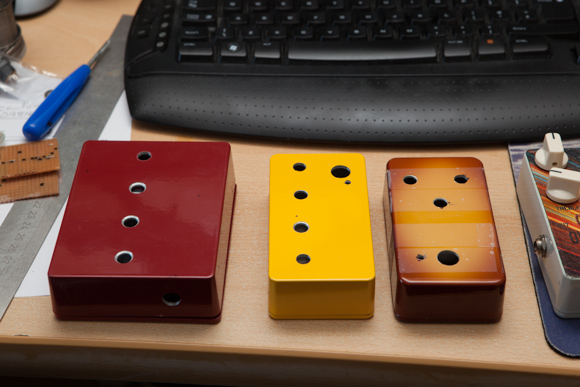
This is a set of three pedals I was planning to build. I prefer to buy pre-drilled enclosures when I buy kits from FuzzDog, but two of these pedals are vero builds (so no PCB's) and the other one, that really nice two tone enclosure...was sourced from a chap in Hong kong on ebay. So these three enclosures will need drilling myself. The first step is to mark out the bank enclosures where they needed drilling. Drilling takes fair bit of effort so I like to bundle a few enclosures up together and hit them all at once. They come in a plastic wrapping, which takes a sharpie really well. That middle enclosure with it's custom paint job...sweet isn't it? The 1st enclosure (the yellow one) will house my Woolly Mammouth bass fuzz pedal, which I am building on Vero as there are no PCB's available. A retail version of this would cost me £350...so this is a more sane option. The middle enclosure is for a Sweet Honey sounding overdrive...built on a Fuzzdog circuit / kit. The last enclosure, the big red one. That's going to be a 4 channel active mixer. Again built on vero.
|
|
|
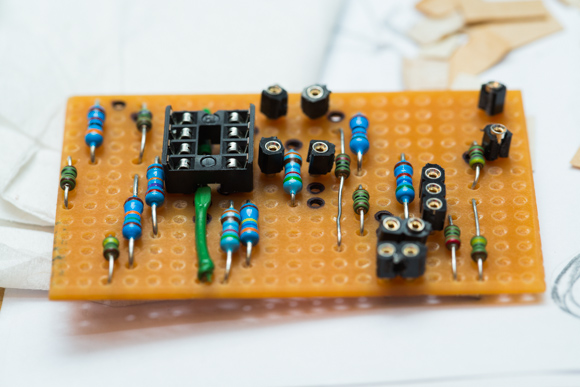
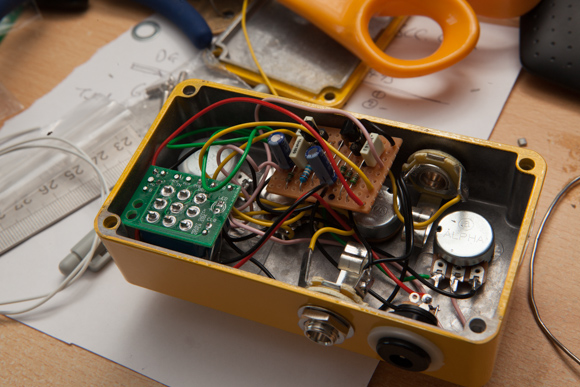
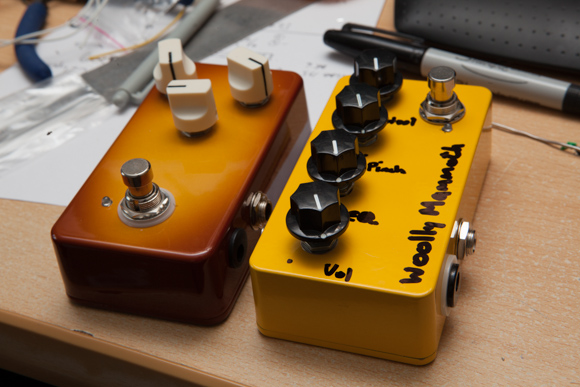
This is the guts shot of my Vero build Woolly Mammouth bass fuzz pedal. The circuit was quite simple (as most fuzzes are) but the housing and 4 pots were more difficult. I wanted to keep the side on pots. But with left and right jacks...fitting it all in was very tight. But I'm really happy with the result.
All labeled up using a sharpie on the yellow casing...it looks nice and it's one of the few circuits that i've built which worked first time :D
It's not a pedal for faint hearted...I think this one needs hazzard stripes and a health warning...hence the yellow enclosure with black writing.
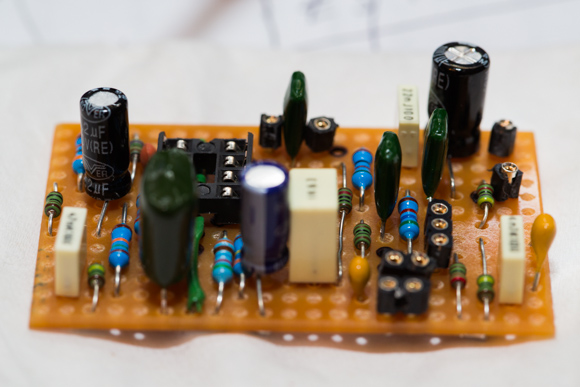
The Sweet Honey overdrive initially had a small fault in my input jack wiring. I leave faulty units 24hrs before I look into the issues. After building them, I usually can't see the wood for the trees and need a fresh set of eyes to investigate.
It's a really nice sounding unit and the grit is slightly better than the Blueberry I built a few months back. But the tone / nature pot is too high of a value to be useful on bass, so I might swap out some caps which are more bass friendly. |
|
|
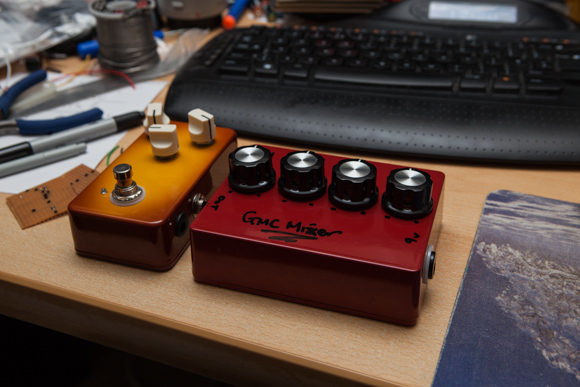
My 4 channel active mixer build went very well. It was built on vero and I probably could fit it in a smaller enclosure, but for this particular application, I think the larger enclosure works better. So I fitted over sized knobs to take up some of the space...and they looks great!
After soldering it all together, wiring and assembling, It worked first time. It's better than I'd hoped, it's got a lot of gain for each channel and it's very transparent and clean. I might mod it soon with a mute switch and LED. |
|
|
|
|
|
|
|
|
|
|
|
|
|
|
|
|